Showing posts with label Seche Vite. Show all posts
Thursday, July 14, 2011

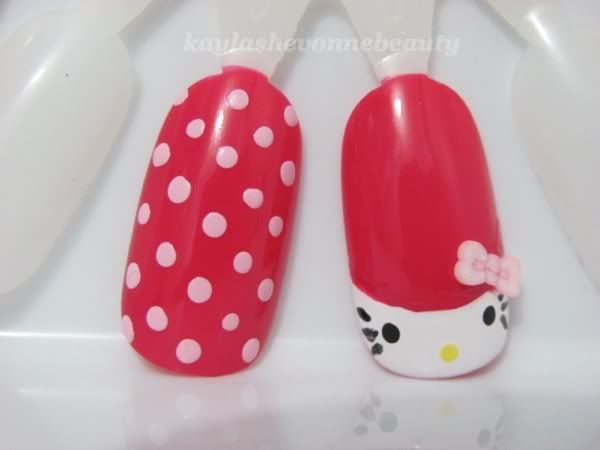
Nail Art Tutorial - Hello Kitty

    Hey guys!

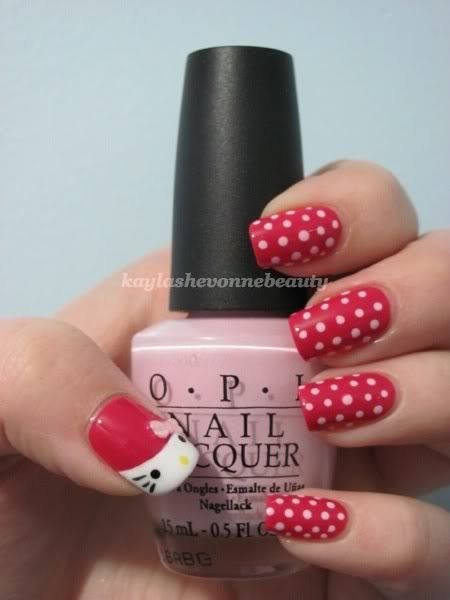
    The most recent sidebar poll was the closest yet with 3 of the options being super close. However, in the end, my Hello Kitty design won out with 30% of the votes.

    The other two options that were very close in the running were my Palm Tree Sunset design with 24% of the votes, and my Ice Cream Sundaes design with 22% of the votes. I'll put both of those designs in the next poll since it seems that you guys definitely want to see tutorials for them.

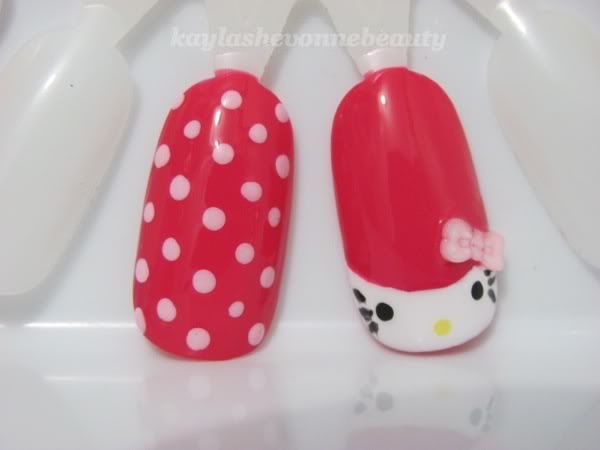
    To refresh, here's the design I'll be doing a tutorial for today:


    Keep reading for the tutorial!


    What you'll need:
    The exact brands/names of the polishes I've used are in brackets but you can use whatever brands/shades you have in your stash.
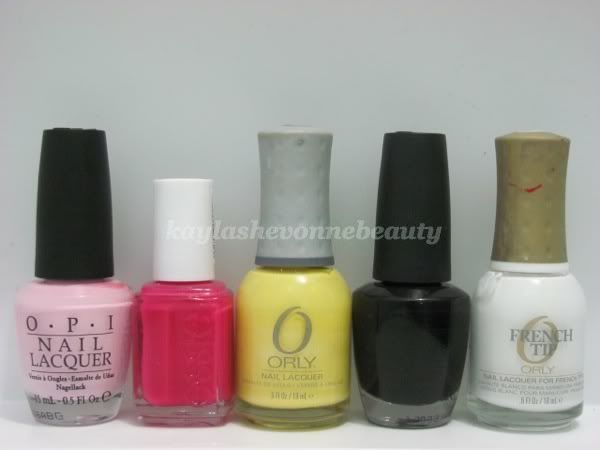
    Cream finish polishes in light pink (OPI Mod About You), hot pink (Essie Bachelorette Bash), yellow (Orly Spark), black (OPI Black Onyx), and white (Orly White Tips).

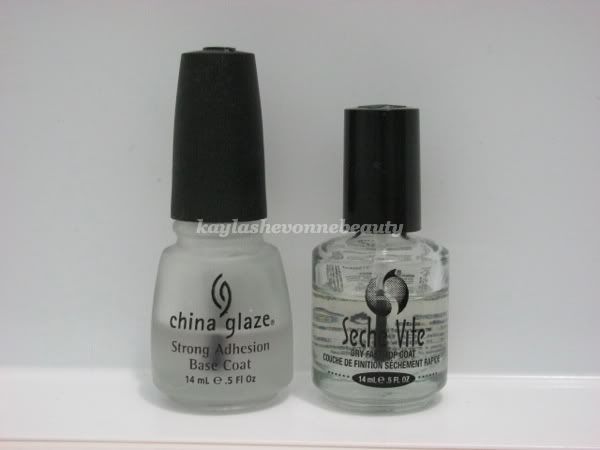
    Your favourite base (China Glaze Strong Adhesion Base Coat) and top coat (Seche Vite Top Coat).

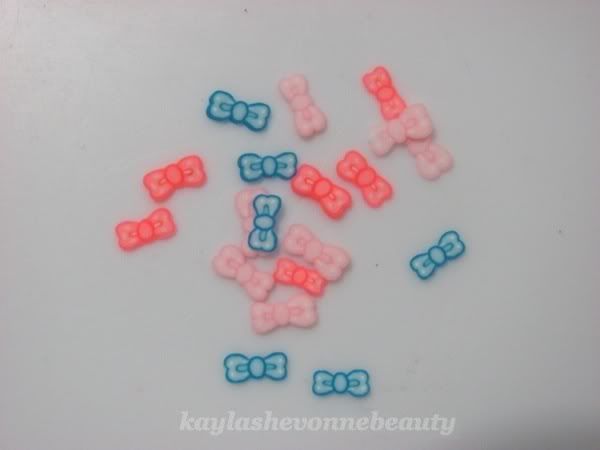
    Fimo bows (mine are from eBay but if you don't have these yourself, you can draw the bow freehand). If you're looking to buy some of these from eBay (they're really inexpensive), simply typing in "nail art bow" in the search bar will yield a number of results.

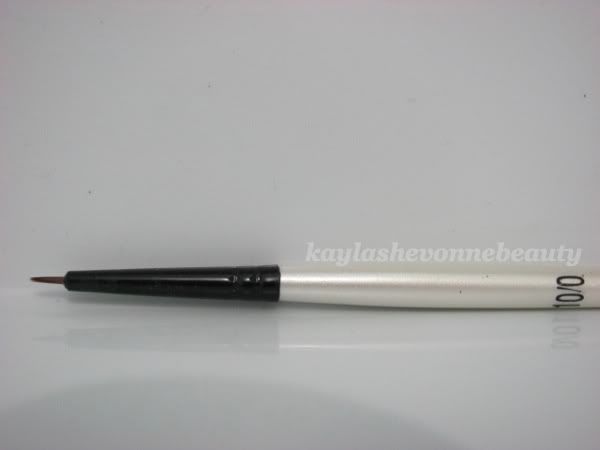
    A detail brush (mine is a paintbrush from Michael's and the brand name is Simply Simmons).

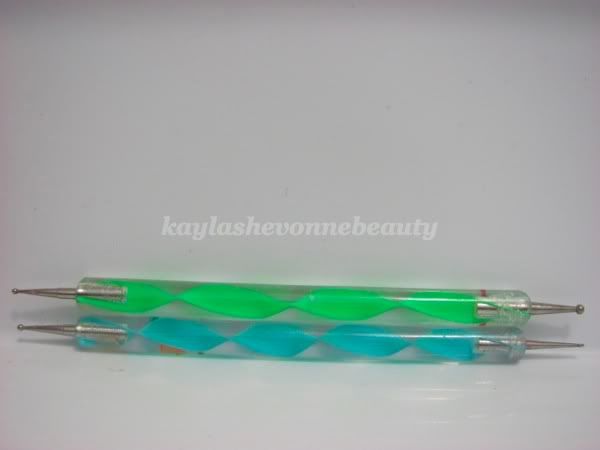
    2 dotting tools: one small and one medium sized (you could also use toothpicks or the ends of bobby pins if you don't have dotting tools like these).

    Step 1:
    Apply your base coat. (I didn't think it was necessary to take a photo of this step.)

    Step 2:
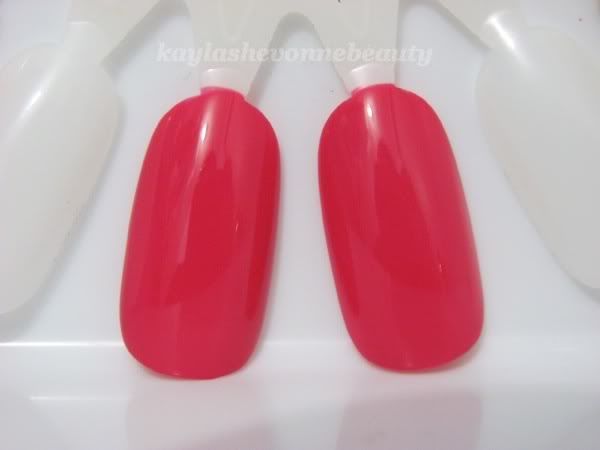
    Apply two coats (or until it's opaque) of your hot pink polish to all of your nails. This will serve as your base colour.


    Step 3:
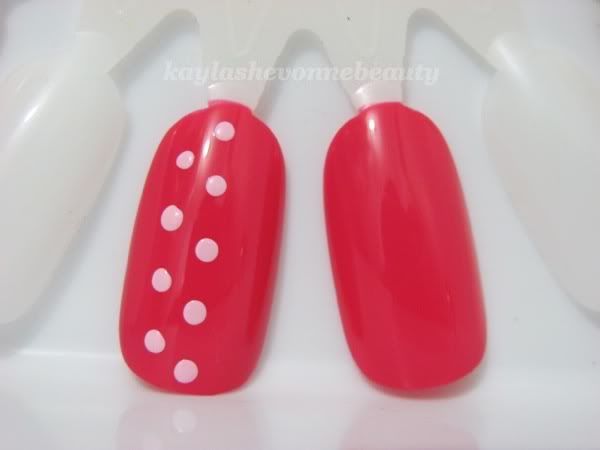
    This is the easy part - the polka dots.
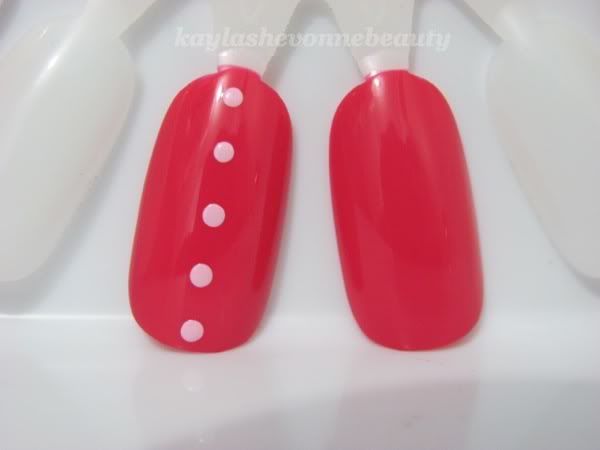
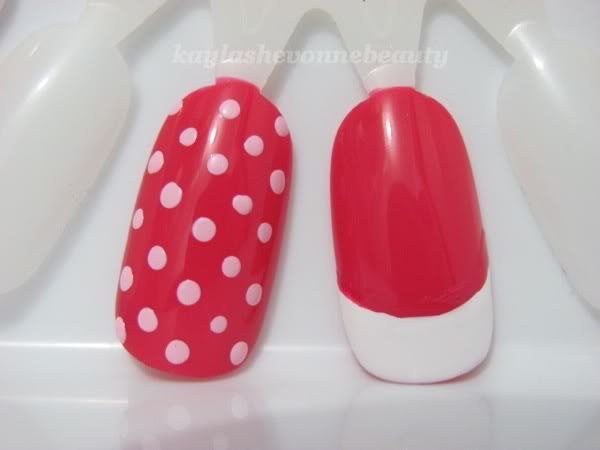
    For all of your nails besides your thumbs, you'll be using your medium sized dotting tool to create the polka dots with your light pink cream polish. The trick to making polka dots looks their best is to order them in a staggered arrangement. In other words, instead of placing them directly side-by-side, you'll want to do one row first and then for your next row, you'll place the dots in between the dots of your first row. It's a hard technique to explain in words but hopefully the pictures will help to make sense out of it.
    As well, you'll want to do your first row of dots in the center of the nail and work outwards.


    Step 4:
    This is where the more difficult and precise freehand work comes in. I won't lie, the rest of the design, i.e. Hello Kitty, will take some patience and precision. If you're not comfortable working with your non-dominant hand, I'd suggest just doing the polka dots on the thumb of your dominant hand so that you don't have to go through the frustration of doing precision work with your non-dominant hand. However, practice makes perfect so if you're up for the challenge, I encourage you to go for it!
    You'll start off by making a simple french tip with your white polish. You want to make sure that the edges of the french tip are curved instead of straight across - this will look more like the shape of Hello Kitty.


    Step 5:
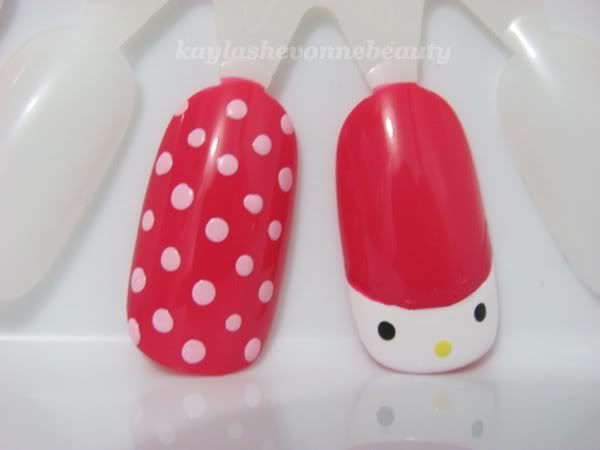
    Using your small dotting tool (or toothpick) and your black polish, make the eyes. You'll want to make them pretty far apart leaving only enough room on either side for some short whiskers.


    Step 6:
    After cleaning the black polish off, use the same small dotting tool and your yellow polish to make the nose. You'll want to make it in between the eyes but a little closer to the tip of the nail.


    Step 7:
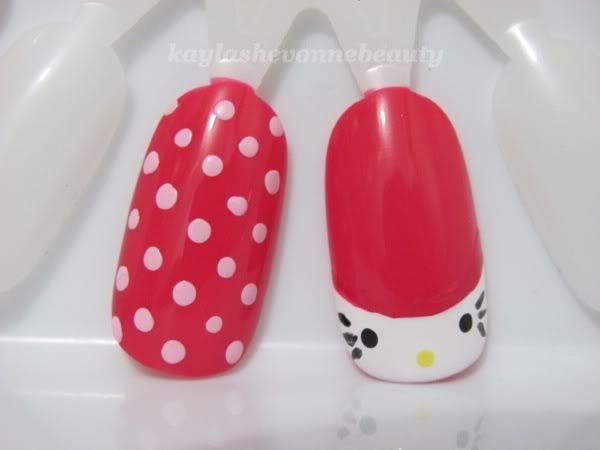
    Using your small detail brush and your black polish, you'll want to freehand 3 wispy black lines on each side of the face.


    Step 8:
    In order to get the fimo bow to stick, you'll want to add a small blob of top coat to the area where you're going to place the bow. You'll want to place the bow on a slight diagonal above Hello Kitty's right eye.


    Step 9:
    After allowing your design to dry completely, add a layer of your favorite top coat. This will make your new mani last longer, it will smooth out any bumps and ridges that have been created during the process and will also give your nails a nice shine.
    Unfortunately I was a little impatient waiting for the design to dry so the top coat dragged the black of the whiskers. However this won't be a problem for you as long as you wait for your design to dry completely before adding top coat.


    As always, I hope this tutorial was helpful and I hope some of you will try this design out for yourselves. And I'd really like to see pictures of this if you try it. :)

Post Title

Nail Art Tutorial - Hello Kitty


Post URL

http://emogirlhairstyles2011.blogspot.com/2011/07/nail-art-tutorial-hello-kitty.html


Visit emo girl hairstyles 2011 for Daily Updated Wedding Dresses Collection
Monday, July 11, 2011

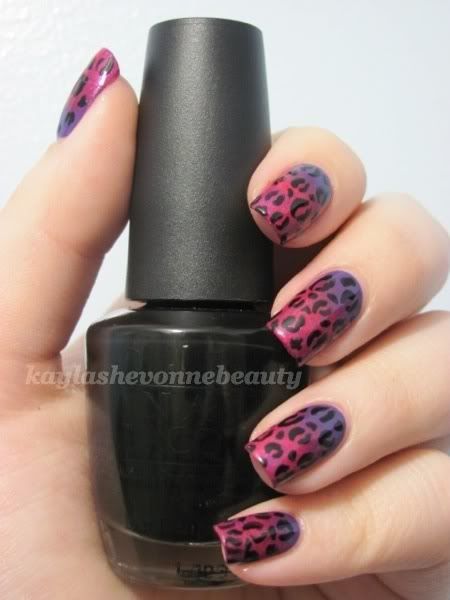
Nails of the Day - Gradient Cheetah

    Hey guys!

    I've spoken before about the Monday nail art challenge that occurs weekly in the Facebook group Polish-aholics Anonymous. Well, this week's theme was sponging and I had a whole design planned but it ending up changing dramatically during the actual process.

    I had planned to do a sunset using deep purple, pink and orange but once I sponged the pink on top of the purple, I loved the result so much that I couldn't bear to add any other colours. So, this gradient with a cheetah print on top was born.

    I could seriously wear animal print nail art every single day so I am of course in love with this. Hope you all like it as well!


    Products:
    CND Stickey Base Coat
    China Glaze - Grape Pop (base)
    Essie - Super Bossa Nova (sponged over base)
    OPI - Black Onyx (cheetah spots)
    Seche Vite Top Coat

Post Title

Nails of the Day - Gradient Cheetah


Post URL

http://emogirlhairstyles2011.blogspot.com/2011/07/nails-of-day-gradient-cheetah.html


Visit emo girl hairstyles 2011 for Daily Updated Wedding Dresses Collection
Tuesday, July 5, 2011

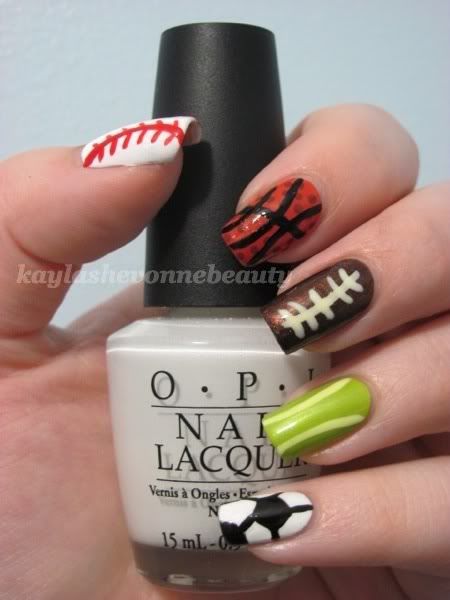
Nails of the Day - Summer Sports

    Hey guys!

    We've been having some really beautiful weather here lately and so I wanted to do a super summery mani to celebrate that. The bf was hanging out and playing different sports at the park with some of his buddies yesterday while I was at work and it completely inspired me to do a sports themed mani.

    I chose 5 different summer sports and interpreted them into a nail art design and although I'm not entirely happy with how it turned out, I still think this is a super fun summer mani. Once again, David was the source of my inspiration so I have to thank him again. :)


    Products:
    CND Stickey Base Coat
    OPI - Alpine Snow (base for baseball and soccer ball)
    China Glaze - Life Preserver (base for basketball)
    China Glaze - Goin' My Way? (base for football)
    Illamasqua - Radium (base for tennis ball)
    China Glaze - Hey Sailor (stitching on baseball)
    China Glaze - Life Preserver mixed with OPI - Black Onyx (dot details on basketball)
    OPI - Black Onyx (lines on basketball, details on soccer ball)
    Illamasqua - Load (details on football and tennis ball)
    Seche Vite Top Coat

Post Title

Nails of the Day - Summer Sports


Post URL

http://emogirlhairstyles2011.blogspot.com/2011/07/nails-of-day-summer-sports.html


Visit emo girl hairstyles 2011 for Daily Updated Wedding Dresses Collection
Sunday, July 3, 2011

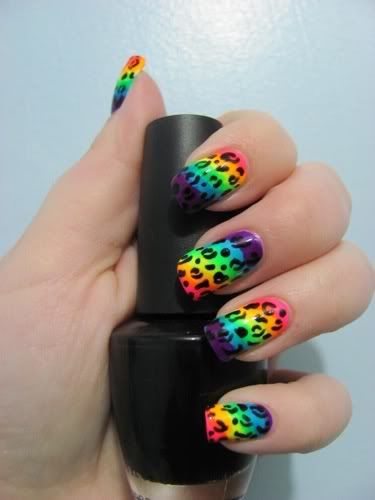
Nail Art Tutorial - Neon Rainbow Cheetah

    Hey guys!

    So last week I put up a poll in my sidebar asking you all to vote and let me know which of my previous nail designs you would like to see a tutorial for next.
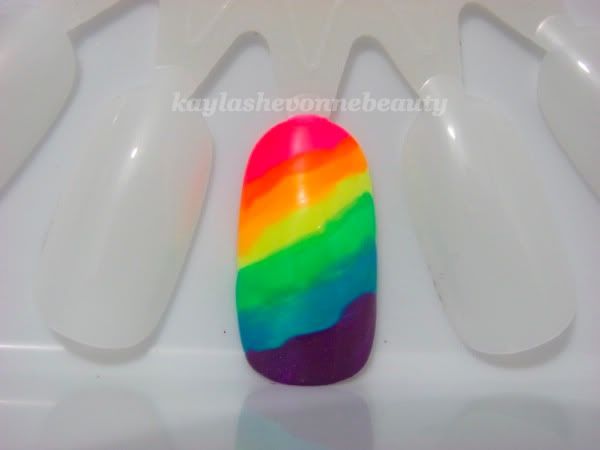
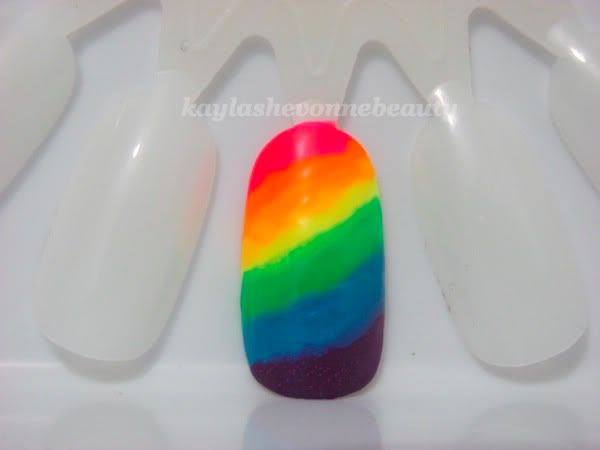
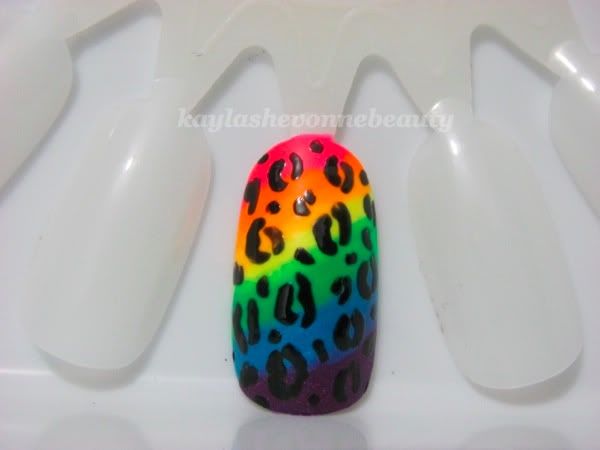
    It was pretty neck and neck for a while between Rainbow Polka Dots and Neon Rainbow Cheetah but in the end, with 37% of the votes, the one you guys wanted to see the most was this one:

    Photobucket


    Keep reading for the tutorial!


    What you'll need:
    The exact brands/names of the polishes I've used are in brackets but you can use whatever brands/shades you have in your stash.


    Black polish (OPI Black Onyx), white polish (Orly White Tips).

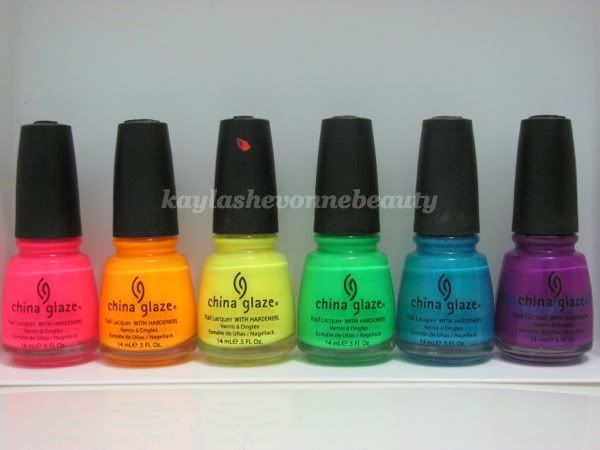
    Neon polishes in pink (China Glaze Pool Party), orange (China Glaze Sun Worshipper), yellow (China Glaze Polka Dot Bikini), green (China Glaze Kiwi Cool-ada), blue (China Glaze Towel Boy Toy) and purple (China Glaze Flying Dragon).

    Your favourite base (China Glaze Strong Adhesion Base Coat) and top coat (Seche Vite Top Coat).

    A detail brush (mine is a paintbrush from Michael's and the brand name is Simply Simmons).

    Step 1:
    Apply your base coat. (I didn't think it was necessary to take a photo of this step.)

    Step 2:
    Apply one coat of your white polish. This will make the neon colours you're using pop and will also just create a better base for your design.


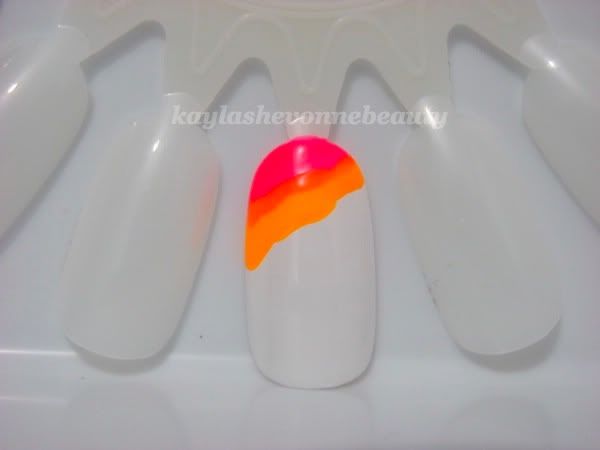
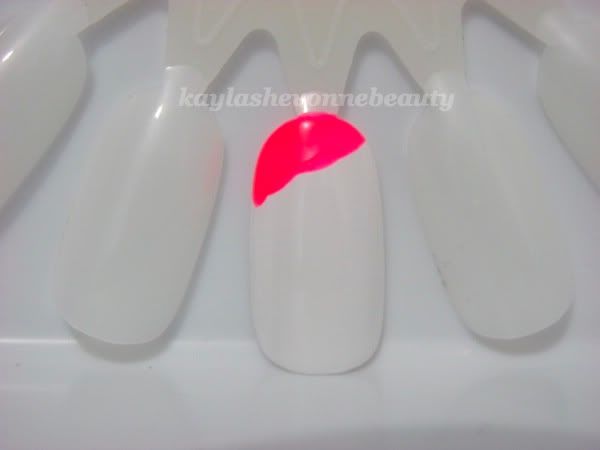
    Step 3: Take your first neon polish (I'm starting with pink), and paint a rough diagonal line at the base of your nail. How thick or thin you make this line is going to depend on the length of your nail (i.e. if your nails are on the shorter side, you should make these lines thinner than what I'm doing here).


    Step 4: While the pink is still wet, do another rough diagonal line using your orange neon polish, making sure to overlap the wet pink polish a bit. This will help to blend the 2 shades together.
    Note: Because neon shades dry rather quickly, you're going to need to work quickly and you should only work on 1 nail at a time. You should also have your colours lined up in the order you'll be needing them, with the caps unscrewed for faster access.


    Step 5: Just as you did in Step 4, take your yellow neon polish and make a rough diagonal line overlapping the wet orange polish.


    Step 6: Continue repeating Step 4/5 with the other 3 colours (green, blue and purple). You should now have something that looks like this:


    Step 7: This step is optional but you may want to go over your colours once more. You may want to do this because a.) you applied the colours a little too sheer the first time around and the base colour of white is still visible and/or b.) the colours aren't as blended as you would like.


    Step 8: After allowing your neon colours to dry, drop a bit of your black polish onto a piece of scrap paper. Then, take your small detail brush and using the black polish, make random, jagged C, backwards C, O and dot shapes. Remember that this doesn't need to be perfect - cheetah spots aren't perfect!
    However, if you're not comfortable with your freehand skills, there are a number of animal print stamps available from brands such as Konad, Bundle Monster, etc. Or, I also think that a layer of Black Shatter/Crackle would look really cool over this rainbow design.


    Step 9: After allowing your design to dry completely, add a layer of your favorite top coat. This will make your new mani last longer, it will smooth out any bumps and ridges that have been created during the process, and will also give your nails a nice shine. As well, for this design in particular, a top coat helps to blend the colours together even better.


    I hope this tutorial was helpful and I hope some of you will try this design out for yourselves! And I'd really like to see pictures of this if you try it. :)
    I'll keep putting polls up in my sidebar so that the tutorials I do are entirely based on what you all want to see.

Post Title

Nail Art Tutorial - Neon Rainbow Cheetah


Post URL

http://emogirlhairstyles2011.blogspot.com/2011/07/nail-art-tutorial-neon-rainbow-cheetah.html


Visit emo girl hairstyles 2011 for Daily Updated Wedding Dresses Collection
Friday, July 1, 2011

Nails of the Day - Canada Day

    Happy Canada Day!

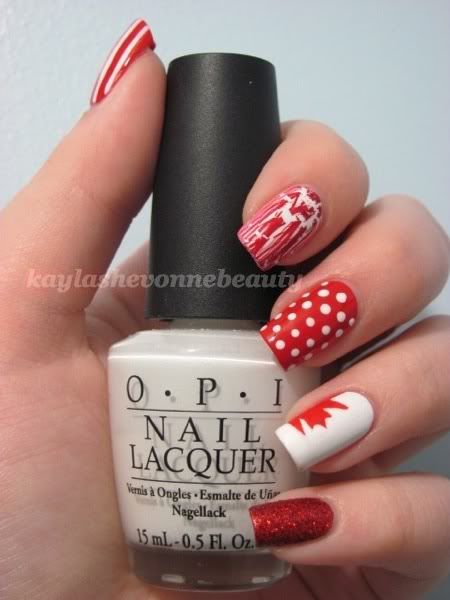
    I originally wasn't planning to do a Canada Day mani but when I thought about all of the awesome red shades that I haven't been able to use in a mani yet (such as Milani Red Sparkle and OPI Red Shatter), I figured that Canada Day was the perfect opportunity to finally use them.

    I was also worried that I would never be able to make the maple leaf perfect and symmetrical so David (my bf) had the brilliant idea of only doing half of the maple leaf and I LOVE how it turned out. Thanks, David. :)


    Products:
    CND Stickey Base Coat
    China Glaze - Salsa (base for thumb and middle, maple leaf)
    OPI - Alpine Snow (base for index and ring, stripes on thumb, dots on middle)
    OPI - Red Shatter (over Alpine Snow on index)
    Milani - Red Sparkle (pinky)
    Seche Vite Top Coat

Post Title

Nails of the Day - Canada Day


Post URL

http://emogirlhairstyles2011.blogspot.com/2011/07/nails-of-day-canada-day.html


Visit emo girl hairstyles 2011 for Daily Updated Wedding Dresses Collection
Saturday, June 25, 2011

Nails of the Day - Celebrating the True Blood Season 4 Premiere

    Hey guys!

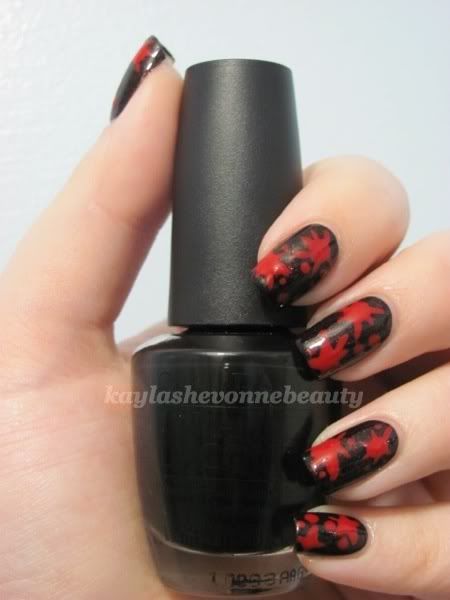
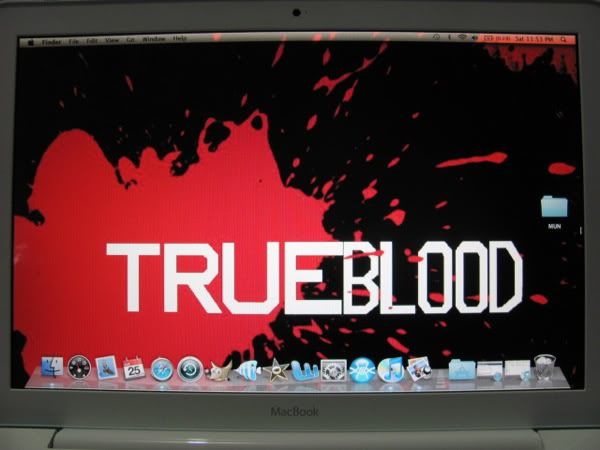
    This mani is going to seem a little out-of-season since it's a bit Halloween-y, but I had to do something to celebrate the return of True Blood. The fourth season premieres tomorrow night and I'm pretty excited. It isn't usually the kind of show I like to watch but I got hooked on it 2 summers ago and I've been a fan ever since.

    The design I chose to do was inspired by the wallpaper on my laptop right now (pictured below) and it's basically the exact same idea as my LGBT Splatter mani, just vampier.

    Anyways, hope you enjoy my mani and the premiere tomorrow night!


    (My inspiration)


    Products:
    China Glaze Strong Adhesion Base Coat
    OPI - Black Onyx (base)
    China Glaze - Lubu Heels (over base)
    China Glaze - Salsa (blood splatters)
    Seche Vite Top Coat

Post Title

Nails of the Day - Celebrating the True Blood Season 4 Premiere


Post URL

http://emogirlhairstyles2011.blogspot.com/2011/06/nails-of-day-celebrating-true-blood.html


Visit emo girl hairstyles 2011 for Daily Updated Wedding Dresses Collection
Tuesday, June 21, 2011

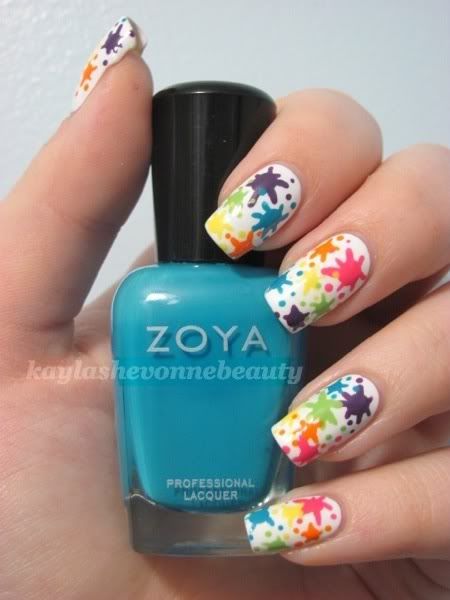
Nails of the Day - Celebrating LGBT Pride Month with a Rainbow Splatter Mani

    Hey guys!

    June is LGBT Pride Month and I wanted to do a mani to celebrate that so I came up with this rainbow paint splatter mani. I feel like I've been doing a lot of rainbow nail art lately (and I still have a couple of more rainbow ideas stores away) but it's summer so it's totally suitable. :)


    Products:
    China Glaze Strong Adhesion Base Coat
    OPI - Alpine Snow (base)
    Zoya - Jolene (pink splatters)
    China Glaze - Papaya Punch (orange splatters)
    Orly - Spark (yellow splatters)
    Orly - Green Apple (green splatters)
    Zoya - Robyn (blue splatters)
    OPI - Funky Dunkey (purple splatters)
    Seche Vite Top Coat

    On an unrelated note, did anyone watch The Voice tonight? How about that new song by Maroon 5? LOVE! Adam Levine is a total babe.

Post Title

Nails of the Day - Celebrating LGBT Pride Month with a Rainbow Splatter Mani


Post URL

http://emogirlhairstyles2011.blogspot.com/2011/06/nails-of-day-celebrating-lgbt-pride.html


Visit emo girl hairstyles 2011 for Daily Updated Wedding Dresses Collection
Monday, June 20, 2011

Nails of the Day - Dots and Stripes (Inspired by my Notebook)

    Hey guys!

    A bunch of us girls from Polish-aholics Anonymous are going to be doing nail art challenges to post on Mondays, and this week's theme is polka dots.

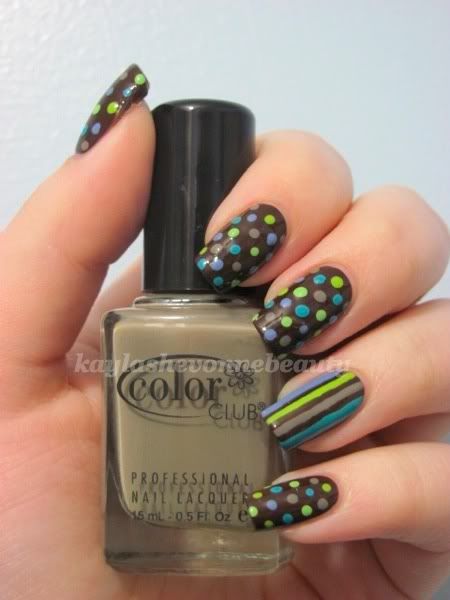
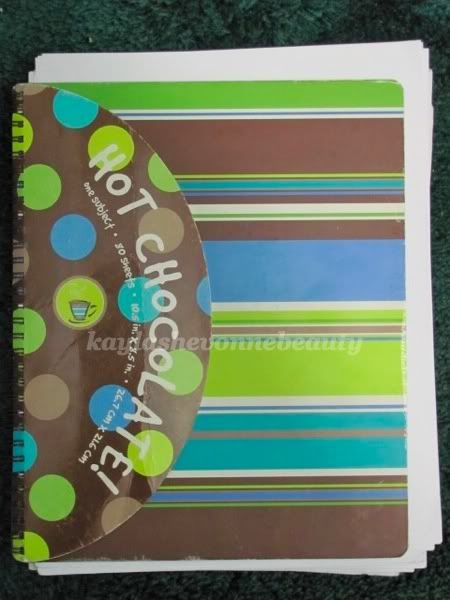
    I may not be able to participate in every weekly challenge but with final exams today and tomorrow, I needed a simple design to do last night, and polka dots was perfect. And as I was writing up some study notes over the weekend, I found the inspiration for my polka dot mani - my notebook! Now it also has coordinating stripes on it and I wanted to add those in as well so I just did an accent nail with stripes.


    (My inspiration)


    Products:
    China Glaze Strong Adhesion Base Coat
    OPI - Suzi Loves Cowboys (base)
    China Glaze - Flyin' High (teal dots/stripes)
    Color Club - Soft as Cashmere (taupe dots/strips)
    Orly - Green Apple (light green dots)
    OPI - Who the Shrek Are You? (acid green dots/stripes)
    Essie - Lapis of Luxury (powder blue dots/stripes)
    Seche Vite Top Coat

    Can't wait to see all of the other girls polka dot designs!

Post Title

Nails of the Day - Dots and Stripes (Inspired by my Notebook)


Post URL

http://emogirlhairstyles2011.blogspot.com/2011/06/nails-of-day-dots-and-stripes-inspired.html


Visit emo girl hairstyles 2011 for Daily Updated Wedding Dresses Collection
Wednesday, June 15, 2011

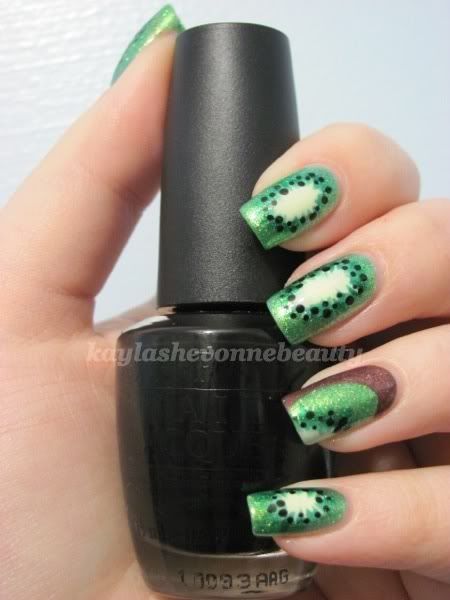
Nails of the Day - Kiwi Fruits

    Hey guys!

    I was feeling completely uninspired today so I asked my polish friends of Facebook to suggest a summery nail art design for me to do tonight, and Rebecca suggested a lemon/lime mani. I decided to do just that but once I put Zoya's Apple on, which was going to be the base for my limes, I thought that kiwis would work better with that colour, so I went with that instead.

    Hope you all like it. :)


    Products:
    China Glaze Strong Adhesion Base Coat
    Zoya - Apple (base for kiwis)
    China Glaze - Hey Doll (kiwi peel on ring finger)
    Illamasqua - Load (middle of kiwis)
    Zoya - Ivanka (darker green detailing)
    OPI - Black Onyx (seeds)
    Seche Vite Top Coat

Post Title

Nails of the Day - Kiwi Fruits


Post URL

http://emogirlhairstyles2011.blogspot.com/2011/06/nails-of-day-kiwi-fruits.html


Visit emo girl hairstyles 2011 for Daily Updated Wedding Dresses Collection
Monday, June 13, 2011

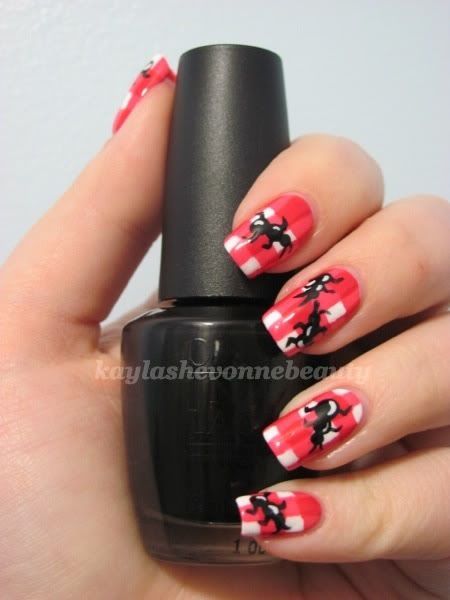
Nails of the Day - Uninvited Picnic Guests

    Hey guys!

    I've seen today's design around the web a few times but by far the best interpretation of it was done by Dollface22772 on youtube who as I've said before, is my all-time favourite nail artist on youtube. Her design had some extra elements to it but I didn't have quite enough time to go all out on this last night so I stuck with a basic version of the design.

    Nonetheless, hope you all like it!


    Products:
    China Glaze Strong Adhesion Base Coat
    Orly - White Tips (base for tablecloth, highlight on ants)
    China Glaze - Heli-Yum (darker squares on tablecloth)
    China Glaze - Sexy Lady (lighter squares on tablecloth)
    OPI - Black Onyx (ants)
    Seche Vite Top Coat

Post Title

Nails of the Day - Uninvited Picnic Guests


Post URL

http://emogirlhairstyles2011.blogspot.com/2011/06/nails-of-day-uninvited-picnic-guests.html


Visit emo girl hairstyles 2011 for Daily Updated Wedding Dresses Collection
Popular Posts

My Blog List